Lazy recipes: how to bake bread in 12 Hours?
Continuing our series of “lazy” recipes. How to bake bread with minimal energy expenditure while stretching the process over time? Besides the classic bread ingredients, you’ll need one hour of involved attention, a deep baking dish with a lid, and a will for experiments.
Baking classic sourdough bread comes with some difficulties. Inthe beginning, you’ll have to create a starter: this takes at least a week, and success is not guaranteed. On the day of baking, you need to feed the starter and carefully monitor it to add to the dough at the right moment. Bread dough not only needs to be kneaded but also stretched every half an hour. As a result, making bread takes a whole day, and the process requires constant attention! But what if you could bake bread without doing almost anything from this list? Gastronomic journalist Liuba Safonova shares the secret.
Why does it work?
There are three main components in bread dough: flour, water, and yeast. When water is absorbed, the protein in the flour (gluten) forms an elastic mass. Yeast consumes carbohydrates and releases carbon dioxide gas, forming cavities. After baking, these cavities appear as holes in the crumb. Thanks to the elasticity of the dough and the large number of bubbles, the bread turns out soft and springy.
Usually, a sourdough recipe includes adding a lot of wild yeast in the form of a starter and then vigorously kneading to make the gluten work faster. But in reality, elastic gluten bonds form on their own, and if you knead the dough as we are used to, it reaches the desired consistency faster. But since we’re not kneading anything, the bread dough needs 6-12 hours to develop the necessary qualities.
Details:
- For baking such bread, you’ll need special cookware — a deep dish with a lid. A Dutch oven works well, but the main thing is that your dish fits the bread and leaves room for rising. If you have a dish but no suitable lid, you can tightly cover it with foil to prevent moisture loss.
- Use strong flour with a protein content of 11-13%. It’s often called Strong bread flour or Pizza flour. If you want to make the bread more interesting, you can replace up to 30% of white flour with whole grain flour.
- It’s nice to add sunflower or pumpkin seeds to this bread. For 500 grams of flour, 50 grams of seeds are enough.
- A large coffee cup holds about 350 ml of water; if you fill it to the top, you’ll get about the amount needed for the recipe. Use this method if you don’t have scales or a measuring cup.
- You’ll need two bowls for mixing: a very large one and a medium-sized one. The large one is for proofing; the dough will increase 2-3 times in 8 hours, and it’s important that it doesn’t spill over. The second one is for the final proof.
- Bread cannot be eaten immediately after baking: it needs about an hour for the moisture to distribute evenly through the crumb.
- For an especially wonderful result, you can first heat the water, dissolve sugar and yeast in it, and then add flour and salt, but this is not necessary.
Ingredients for a small loaf:
- Flour — 500 g + a little more for dusting
- Salt — 8 g
- Water — 375 ml
- Honey — 1 teaspoon
- Yeast — 1 g (⅙ teaspoon)
Let’s cook:
- In a large bowl, mix all the ingredients. Stir well to ensure there’s no dry flour left. You don’t need to do anything else.
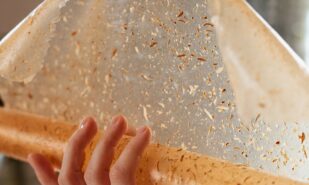
- Cover the bowl with plastic wrap and place it in a draft-free spot. A turned-off oven, the top of the refrigerator, an empty cabinet, or any other place where the dough won’t be disturbed will do. Instead of plastic wrap, you can use a clean towel if the air in your house is humid enough to prevent the dough from drying out. Return approximately 8 hours later. In cold weather, proofing may take longer, and in hot weather, less time. For example, in August 2023, when it was +28°C in London, the dough rose in 4-5 hours. The surface of the dough ready for baking will be covered with large bubbles.
- Spread a smooth towel (not terry cloth) on the table, sprinkle it with flour, and rub some flour into the fabric well. The layer of flour should be thick enough so that the dough doesn’t stick to the cloth. Place the towel in a clean and dry bowl, with the floured side facing up. Make sure the edges of the towel are also floured — we’ll use them to cover the dough during proofing.
- Sprinkle flour on the table; it should cover a square with sides of 35-40 centimetres (or a circle with the same diameter — whichever you prefer). Transfer the dough from the bowl to the table. If it immediately spreads out, you’ve done everything right!
- Fold the dough towards the centre: first, the right and left sides overlap, slightly stretching, and then the top and bottom. If the dough immediately relaxes, leave it for 5-10 minutes, then repeat the process. Gently transfer the dough to the proofing bowl, seams facing up, cover with a towel, and let it rest for 1 hour.
- Preheat the oven to 240°C. Place an empty baking dish with a lid inside to heat up — it should be hot when we start baking the bread.
- After half an hour, check the dough: if you press on it, it should leave an indentation. If you press on the dough and the indentation disappears immediately, it needs another 10-20 minutes to reach the right condition. If it’s ready, place a square of parchment paper on top of the dough — it will be easier to transfer it to the baking dish, and the bread won’t stick.
- Remove the baking dish from the oven, and place the lid next to it with the handle up. Take the bowl with the dough, putyour hand on top, invert the bowl, and remove the future loaf. Carefully transfer it to the baking dish, make a cross-shaped incision about 5 millimetres deep, cover the dish with the lid, and put it in the oven.
- Bake the bread covered for 45 minutes. Then remove the lid, reduce the temperature to 200°C, and bake for another 30 minutes.
- Remove the bread from the dish and transfer it to a cooling rack. If you want the bread to have a soft crust, wrap it in a towel. Prefer a denser crust? Leave it as is. After about an hour or two, it’s ready to be sliced for sandwiches, dipped in borscht, or simply sprinkled with salt.